Network Security Groups provide advanced security protection for the VMs that you create. They control inbound and outbound traffic passing through a Network Interface Card (NIC) (Resource Manage deployment model), a VM (classic deployment), or a subnet (both deployment models).
NSGs contain rules that specify whether the traffic is approved or denied. Each rule is based on a source IP address, a source port, a destination IP address, and a destination port. Based on whether the traffic matches this combination, it either is allowed or denied. Each rule consists of the following properties:
- Name. This is a unique identifier for the rule.
- Direction. Direction specifies whether the traffic is inbound or outbound.
- Priority. If multiple rules match the traffic, rules with higher priority apply.
- Access. Access specifies whether the traffic is allowed or denied.
- Source IP address prefix. This identifies from where traffic originates. This prefix can be based on a single IP address, a range of IP addresses in CIDR notation, or the asterisk (*) wildcard character, that must match all possible IP addresses.
- Source port range. This specifies source ports by using either a single port number from 1-65535, a range of ports (200-400), or the asterisk (*) wildcard character that denotes all possible ports.
- Destination IP address prefix. This identifies the traffic destination based on a single IP address, a range of IP addresses in CIDR notation, or the asterisk (*) wildcard character, that must match all possible IP addresses.
- Destination port range. This specifies destination ports by using either a single port number from 1-65535, a range of ports (200-400), or the asterisk (*) wildcard character, that denotes all possible ports.
- Protocol. Protocol specifies a protocol that matches the rule. It can be UDP, TCP, or the asterisk (*) wildcard character *.
Network security groups are resources that are created in a resource group, but can be shared with other resource groups that exist in your subscription.
Some important things to keep in mind while implementing network security groups include:
- By default, you can create 100 NSGs per region per subscription. You can raise this limit to 400 by contacting Azure support.
- You can apply only one NSG to a VM, subnet, or NIC.
- By default, you can have up to 200 rules in a single NSG. You can raise this limit to 500 by contacting Azure support.
- You can apply an NSG to multiple resources.
Let me show, how to create and configure network security groups step-by-step.
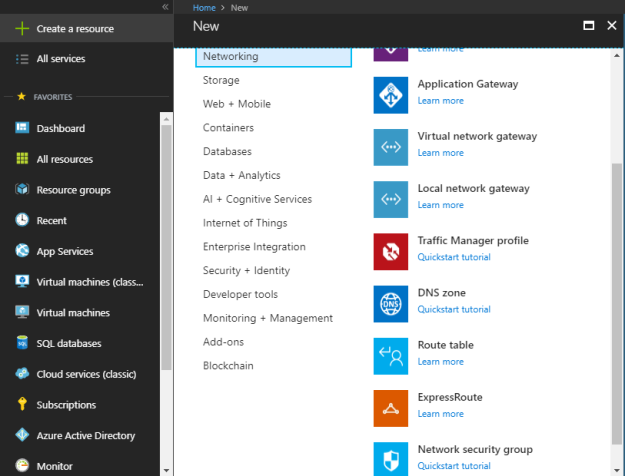
Login to the Azure Portal and select “+ Create a resource”. Select the “Networking” and then select “Network security group”.
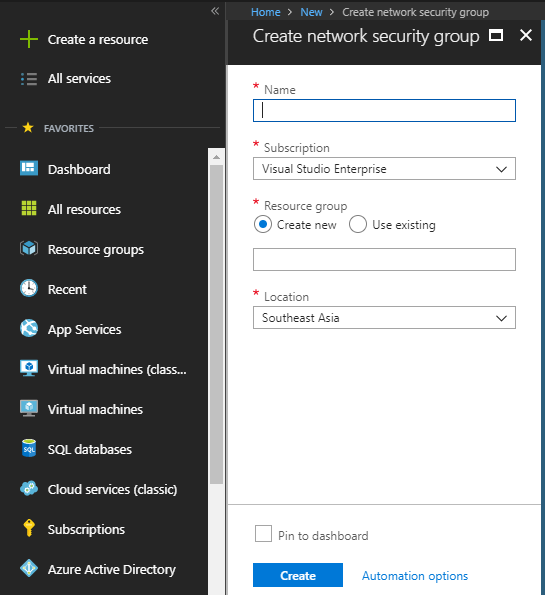
Specify the name of the NSG, select the subscription, select the right resource group from “Use existing” or create a new one, and finally define the location if you are creating a new resource group but if you are using existing resource then location will be selected by default according to the resource group location. Once done, click on “Create” to create a network security group.
Once network security group is created, you look at the default configuration and change the configuration based on your need.
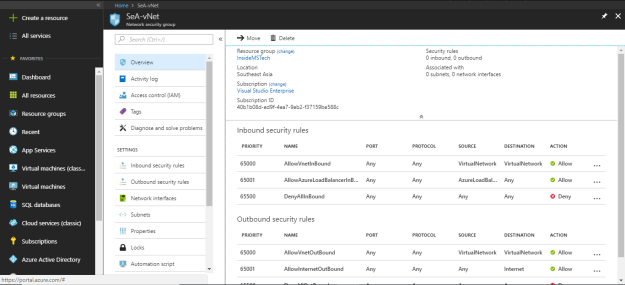
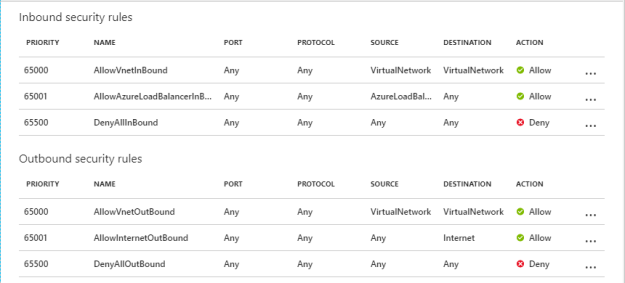
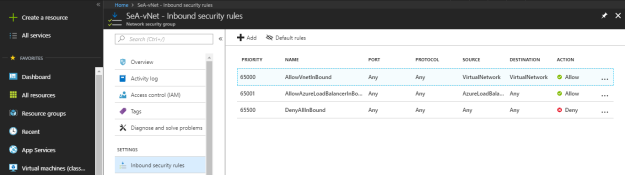
These are the default inbound and outbound security rules.
Click on “Add” to create a new inbound security rule under “Inbound security rules”.
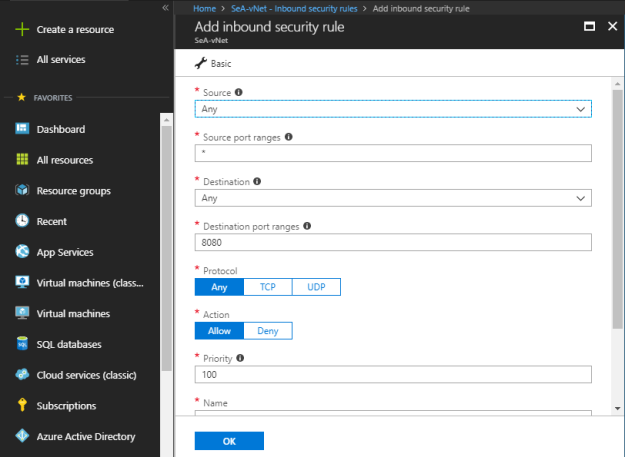
In Inbound security rule, you define following things:
Source:
- Any: If you select “Any” then it accepts all inbound requests from any source, doesn’t care about the source network or endpoint.
- IP Addresses: You can define specific IP Address ranges.
- Service Tag: You can specify the service tags. For example, if you select storage then it allows all the storage categories of IP addresses.
Source port ranges: Specify the multiple ports separating with “‘,” (comma) such as 80, 443 or a series of ports such as 50000-50100.
Destination:
- Any: If you select “Any” then it accepts all inbound requests for any destination, doesn’t care about the destination network.
- IP Address: You can define specific IP Address ranges.
- VirtualNetwork: Any virtual network as a destination network.
Destination port ranges: Specify the multiple ports separating with “‘,” (comma) such as 80, 443 or a series of ports such as 50000-50100.
Protocol: You can select protocols, Any, TCP or UDP.
Action: Allow or Deny.
Priority: Priority can be set between 100 and 4096. Least priority will have highest preference.
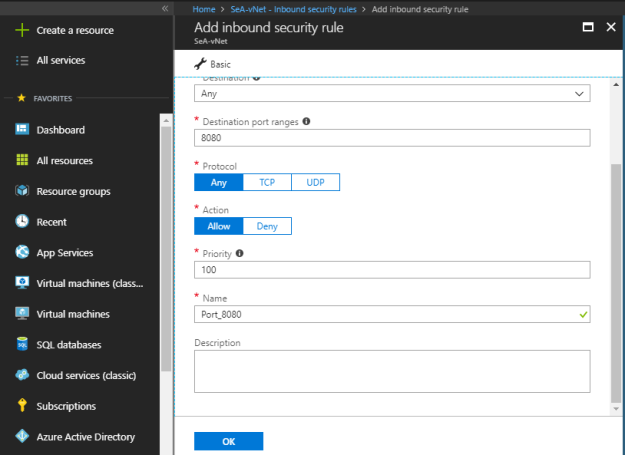
Name: Set the name of the NSG rule.
Description: Write description for the NSG rule that best describes the respective rule.
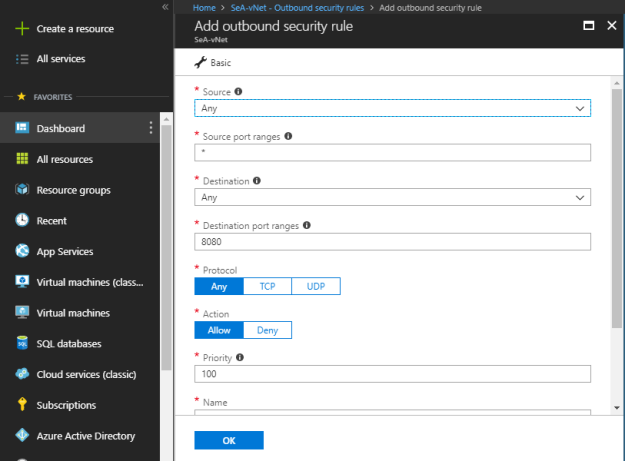
Click on “Add” to create a new outbound security rule under “Outbound security rules”.
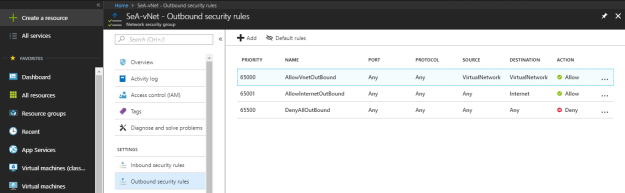
In Outbound security rule, you define following things:
Source:
- Any: If you select “Any” then it accepts all outbound requests for any destination, doesn’t care about the source network.
- IP Address: You can define specific IP Address ranges.
- VirtualNetwork: Any virtual network as a source network.
Source port ranges: Specify the multiple ports separating with “‘,” (comma) such as 80, 443 or a series of ports such as 50000-50100.
Destination:
- Any: If you select “Any” then it accepts all inbound requests from any source, doesn’t care about the destination network or endpoint.
- IP Addresses: You can define specific IP Address ranges.
- Service Tag: You can specify the service tags. For example, if you select storage then it allows all the storage categories of IP addresses.
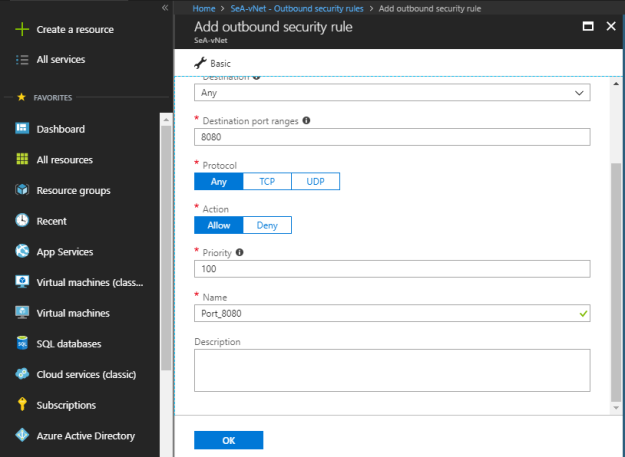
Destination port ranges: Specify the multiple ports separating with “‘,” (comma) such as 80, 443 or a series of ports such as 50000-50100.
Protocol: You can select protocols, Any, TCP or UDP.
Action: Allow or Deny.
Priority: Priority can be set between 100 and 4096. Least priority will have highest preference.
Name: Set the name of the NSG rule.
Description: Write description for the NSG rule that best describes the respective rule.
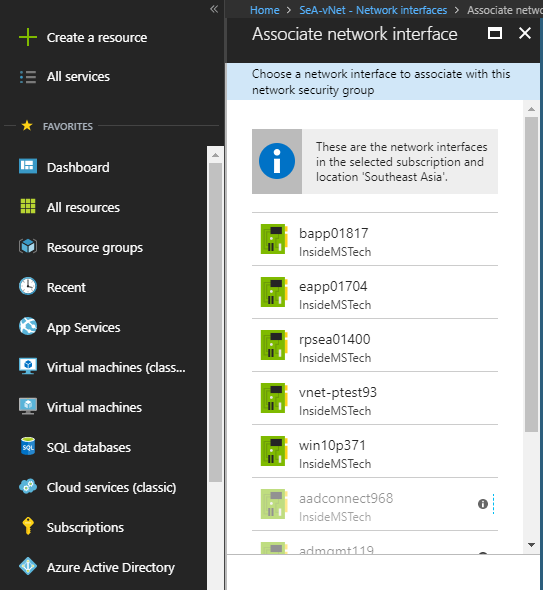
You can associate any specific network interface with network security group under “Network interfaces”. Select “+ Associate” to attach network interface with NSG.

Select a specific network interface that needs to be linked with NSG.
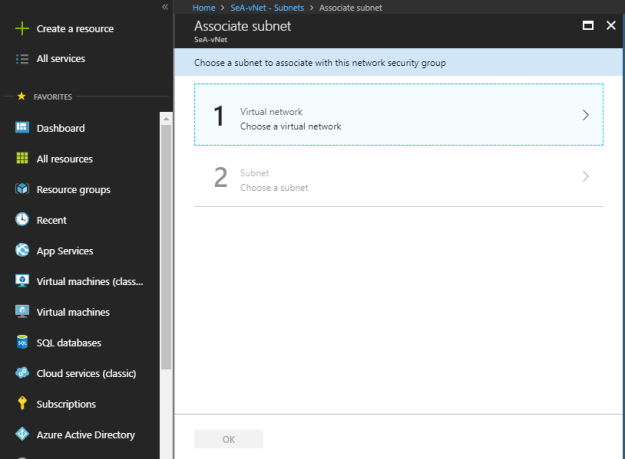
You can associate any specific virtual network subnet with network security group under “Subnets”. Select “+ Associate” to attach virtual network subnet with NSG.
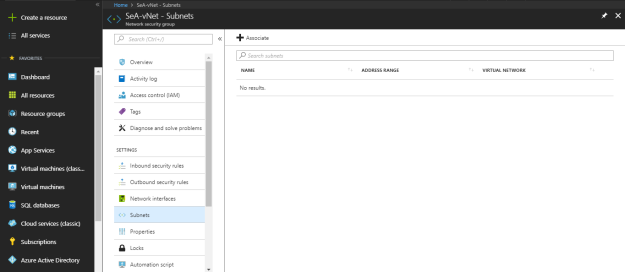
Select a specific virtual network subnet that needs to be linked with NSG.
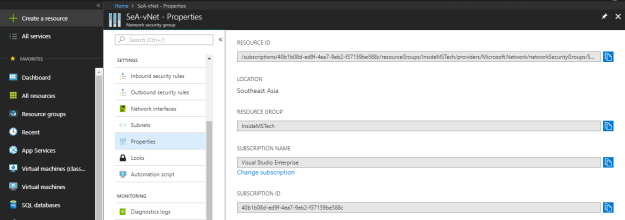
In the properties section, you can look at the resource properties.
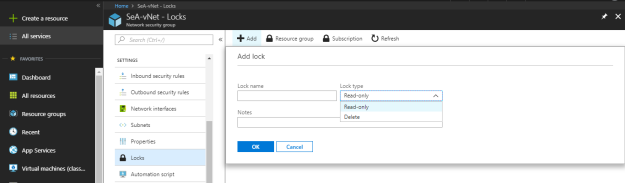
Under the locks section, you can create and configure the lock type to prevent changes and protecting the azure resources.
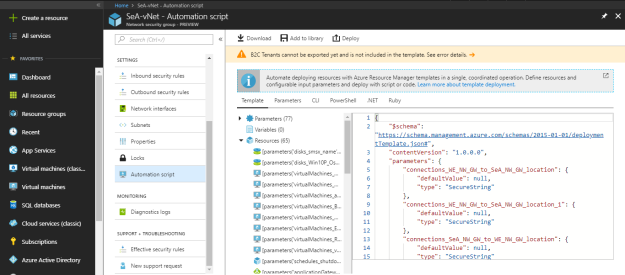
Under the “Automation script” download the script or add to library for reuse.
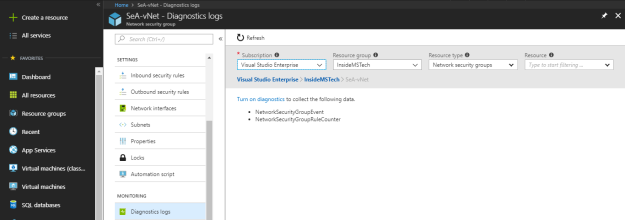
Under the diagnostic log, you can enable diagnostic for NSG to collect “NetworkSecurityGroupEvent” and “NetworkSecurityGroupRuleCounter” data.
I hope, this article helped you to understand, create, configure and manage Network Security Groups.
