In preceding posts, I have covered SQL Server installation, configuration, and DFS deployment which are required for Enterprise Edition Front End pool. This blog post will cover all the steps which are required before defining Front End pool while pool configuration and step by step deployment of the FE servers in a new pool will be covered in the next part of this post.
You need minimum three FE servers for Enterprise Edition Pool. Join all three server in domain and login to the first server with administrative account. Administrative account should have Schema Admin, Enterprise Admin and Domain Admin membership to prepare active directory.
1. Open PowerShell and install Skype for Business Server prerequisite.
Insert or map windows server installation media and open Powershell with administrative rights.
Note: In my setup, using D: for installation media. Change drive letter in below powershell cmdlet according to your setup.
Add-WindowsFeature NET-Framework-Core, RSAT-ADDS, Windows-Identity-Foundation, Web-Server, Web-Static-Content, Web-Default-Doc, Web-Http-Errors, Web-Dir-Browsing, Web-Asp-Net, Web-Net-Ext, Web-ISAPI-Ext, Web-ISAPI-Filter, Web-Http-Logging, Web-Log-Libraries, Web-Request-Monitor, Web-Http-Tracing, Web-Basic-Auth, Web-Windows-Auth, Web-Client-Auth, Web-Filtering, Web-Stat-Compression, Web-Dyn-Compression, NET-WCF-HTTP-Activation45, Web-Asp-Net45, Web-Mgmt-Tools, Web-Scripting-Tools, Web-Mgmt-Compat, Server-Media-Foundation, BITS -Source D:\sources\sxs

2. Download and install hotfix KB article 2858668 for windows server 2012 and KB article 2982006 for windows server 2012 R2.

3. Download and Install Silverlight.
4. Insert Skype for Business media and run setup.exe
5. Change installation location if you don’t want to install SfB on OS drive > Install

6. Accept license agreement > Next.

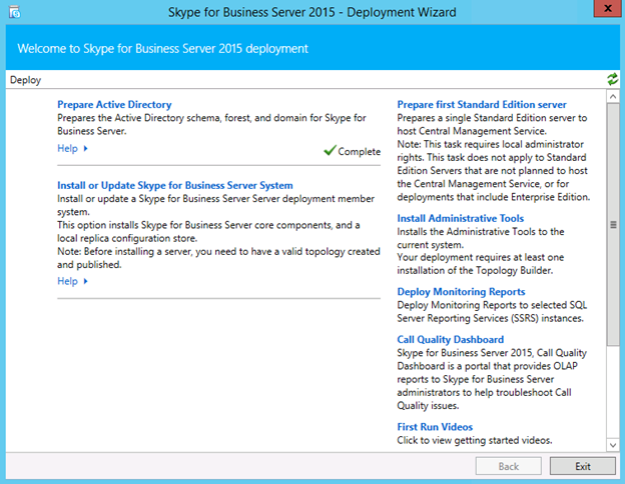
7. Prepare Active Directory.

Once prepare active directory step is completed successfully.
- Open Active Directory Users and Computers and make current user member of CSAdministrator
- Open DNS and create SRV and A records
i) Create _sipinternaltls service location record.
Open DNS Manager and select domain under Forward Lookup Zones. Right click on domain or right click on right pane and select other New Records
Select “Service Location (SRV)” and click on Create Record
Service: _sipinternaltls
Protocol: _tcp
Port number: 5061
Host offering this service: FQDN of your Standard Edition Server (Ex: pool1.uc.lab)
ii) Create following Host(A) records
Dailin
Meet
Admin
Sip
Lyncdiscoverinternal
8. Install Administrative Tools.


Please see, next part (Part II) for defining FE pool and installation and configuration of first FE server.
